COAT RACK
Materials -
-
Acrylic Paints (we used 3 shades of green)
-
Drill
-
Knobs and/or Hooks
-
Paintbrushes
-
Painting Tape
-
Phillips Head Screwdriver
-
Ruler
-
Scissors
-
Screws
-
Sharpie
-
String or Wire
-
Wood Board (5/8" thick)
Instructions:
-
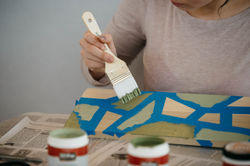
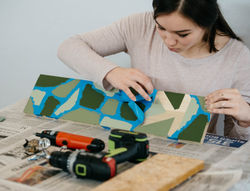
Use scissors to cut painting tape and lay it on the wood in the design you prefer.
-
Paint the wood with acrylic paints and let dry.
-
Use a ruler to lay out the knobs and hooks in a straight line in the order you prefer. Use a sharpie to make marks for drilling. Carefully drill on the marks all the way through the wood.
-
Screw the knobs into the holes.
-
Hot glue the wire onto the back of the board.
-
Hang the rack on the wall.
The chaotic life of a college student can be simplified with a place to keep the important things: coat, wallet, keys. This coat rack is a lifesaver!
 |  |  |
|---|---|---|
 |  |  |
 |  |  |
 |  |  |
Price Range
$$$
Time Estimate
45 minutes
Suggested Retailers
Acrylic Paints -
Michaels, Hobby Lobby
Handheld Drill -
Home Depot, Walmart
Knobs and Hooks -
Home Depot, Target Walmart
Paintbrushes -
Michaels, Target, Home Depot, Walmart
Painting Tape -
Home Depot, Target, Walmart
Phillips Head Screwdriver -
Home Depot, Target, Walmart
Screws -
Home Depot, Target, Walmart
String/Wire -
Michael's, Home Depot, Walmart
Wood Board -
Home Depot
Project Inspiration
Try these projects next!